|

Chapter Twelve
Theme: Plants
|
A good month in which to explore this theme is May or an earlier spring month. May is especially suitable because children can give plants to their mothers for Mother's Day. The theme of plants can be anticipated a month earlier if you start plants from seed six to eight weeks ahead of time. Other alternatives for Mother's Day presents are to transplant plants purchased in flats into individual containers for gifts and to make paper flower bouquets. The theme of plants can also be anticipated in the fall with activities such as leaf gathering, seed collecting, and bulb planting. Many of the fall activities regarding leaves, seeds, and flowers can be recorded, saved, and compared with related activities in the spring.
Language Arts: Oral Language
Sentence Patterns
Help children hear and reproduce sentence patterns by changing the words in the following nursery rhyme:
Mary, Mary, quite contrary,
How does your garden grow?
With silver bells and cockleshells,
And pretty maids all in a row.
Explain that "silver bells," "cockleshells," and "pretty maids" are names for flowers that look like bells, shells, and girls dressed up in party clothes. Ask the children to imagine flowers that look like these and other familiar things, such as spoons, balls, or stars. Have them color pictures of make-believe gardens with the flowers they have imagined. (If you like, provide patterns to trace and cut out of construction paper.) Discuss the pictures together, inviting children to tell about their gardens using the Mary, Mary question-and-answer format as follows:
(You say)
Michael, Michael, quite contrary,
How does your garden grow?
(And Michael says)
With purple spoons and yellow stars
And green balls all in a row.
Language Arts: Listening
Listening to Each Other
Any unit on plants is likely to have a strong scientific focus. As children plant seeds, sprout lima beans, and grow plants, they ask many questions, some of which are not easy to answer, such as: Why does the sun shine? What do our plants do at night when we're gone? Why does too much water turn plants yellow? Many of the questions you will probably be able to answer, but that doesn't mean you should answer them right away; instead, when interesting questions pop up, encourage the whole class to think about them. Accept all answers, not just "correct" ones; encourage the children to listen carefully to each other's ideas. Praise the children's thoughtfulness and, when appropriate, guide them toward the correct answer. Sometimes, however, you might not need to conclude a discussion with a scientific answer; for kindergartners, imaginative answers may suffice.
Tree Diary
"Adopt" a tree outside of your school. Keep a class diary for the tree in a pad of language experience paper, making entries once a week. Each week have the children dictate how the tree looks, what the weather is like for the tree, and what animals are observed in and around the tree. Sometimes you might want to ask children to volunteer to write the dictation. (It doesn't matter if they do it correctly-the point is for them to have the experience of writing down someone else's words.) Have different children illustrate the diary each week. Save the pad in a special place for the children to "read" in their free time.
Flower and Fruit Names
Discuss again the names of the flowers in Mary's garden: silver bells, cockleshells, and pretty maids. Talk about other interesting flower names-snapdragons, tiger lilies, buttercups, and bluebells-showing the children pictures of these flowers and asking them why they think the flowers are so named. Ask the children to list flower names that people have, such as Daisy, Flora, Marguerite, and Sweet Pea, and show them pictures for these flowers too. Ask them how they think the following fruits were named: orange, tangerine, plum, and peach. Make word cards of fruits and flowers for the children to copy in their writing. (Click here for information on making word cards.)
Language Arts: Reading
Sequence Stories
Take photographs of four-step processes in your classroom. For this unit, the processes are likely to involve plants growing. Make a bulletin board for the photographs, asking children to tell you the order in which to display them to show the proper sequence of the process. Make word cards to go under the pictures that say first, next, then, finally. Have the children draw their own picture sequences and label them first, next, then, and finally. Use these words frequently in class to discuss sequence. For a three-step sequence, drop one of the words after first. For a two-step process, drop two of the words after first. Encourage the children to "read" the pictures to tell stories about the processes they have used.
Social Studies
Classroom Farmers
CONCEPT: A plant farmer's job is to plant new plants and take care of them.
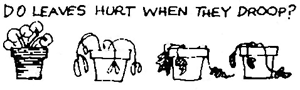
Set up a "farming" or "gardening" center on a table or counter near a window. Experiment with the children to find out what spot works best for growing plants and which plants grow best in your room. Provide in the center accessible planting equipment, such as jars, covers, water, toothpicks, potting soil, pebbles, paper cups, other containers, masking tape and pencils for labeling cups, and newspaper. Explaining that new plants can grow from old ones, demonstrate one planting project at a time, afterward letting children start that project on their own with avocado pits, sweet potatoes, or carrot tops they bring in from home. Teach them to clean up after themselves. If you like, "harvest" plants before vacation times, letting children take them home for good. Start new plants after vacation.
Carrot Plants
You need the tops of carrots (or beets) that have stems still on. Cut the stems back to one inch. Fill a shallow container with water. Sprinkle the bottom with small pebbles. Arrange carrot tops on top, stems up. Place in indirect light. Keep the pebbles and the bottom of the carrots wet. You should see new plant growth within a week.
Sweet Potato Plant
Place potato in container with toothpicks, as for avocado. Either end of the potato will do. After the roots have formed and the stem has appeared, plant in soil.
Avocado Plant
Dry the pit. Peel off the skin. Poke toothpicks into the pit, and set it over a cup of water, fat end down, so that the bottom is wet. Place in indirect light. Keep the bottom wet with frequent watering. In three weeks a root should grow down, and soon afterward a stem should grow up. Plant the pit in a pot, not quite burying the pit. When the stem is seven inches tall, cut it back halfway to make the plant branch.
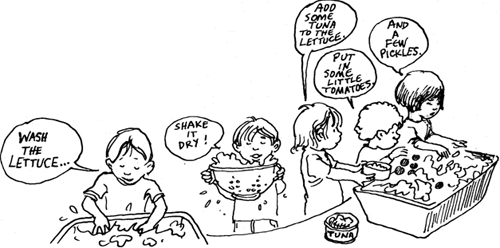
Classroom Salad Chefs
CONCEPT: A "chef' is someone who prepares food for others to eat.
Explain that many people like to eat salads because they are healthful. Have the children pretend they are salad "chefs." Have them wash their hands, provide them with salad ingredients and paper plates, and help them make salads to eat in class. Let the children create their own recipes for salads, taking down their dictation for a class salad cookbook.
Science
Plant Seeds
Explain that seeds are baby plants. Have each child plant three to four zinnia seeds or marigold seeds in damp soil in paper cups. Follow the directions on the seed packages. In a week or two you should see some signs of growth. Have the children save their best one or two seedlings, pulling up the rest to prevent crowding, and perhaps donating seedlings carefully to other children whose seeds didn't sprout. If you want plants for Mother's Day gifts, start them ahead of time. Consult the seed packages to see how long the flowers will take to bloom.
Transplant Small Plants
If you haven't time to plant seeds for Mother's Day flowers, you can buy small plants at a garden center. Have each child transplant a small plant into a paper cup. Mark the cups with names on masking tape. Have the children grow the plants in class for a few weeks before taking them home. Question for discussion: What do plants need to live? (water, air, and food-usually found in the soil).
Sprout Lima Beans
Show each child how to curl a thin sponge or folded paper towel around the inside of a plastic cup. Help each child put two or three dried lima beans between the sponge and the cup, and then pour in enough water to dampen the sponge. Don't cover. Set in indirect sunlight, where the children can observe the beans each day to make sure the sponge is damp. Mark on the calendar when the Iimas begin to sprout. Elicit in discussion the observations that the beans send roots down and stems up. Question for discussion: How do the lima beans know which way is up? Good question. Let the children come up with their own imaginative answers. Take down their dictation and have them illustrate their "scientific" explanations.
Celery Experiment
Serve celery sticks for a snack. While the children are eating the celery, encourage them to observe how the celery is made. Set a stalk of celery with leaves in a glass of red food coloring, slightly diluted. Have the children draw pictures of the celery as it is at this time. Write, or let them write, the word before on their pictures. Then ask the children to predict what will happen to the celery. Have them draw pictures of their predictions. Write, or let them write, the word prediction on their pictures. An hour or two later, have the children observe the changes in the celery. (The leaves should be brownish.) Cut crosswise across the stalk to observe cross-sections of the veins, which should be red. Elicit through discussion the concept that a celery stalk has veins (like tubes or straws) that carry liquids up to the leaves above. Record the results of the experiment with new pictures, labeled alter. Have the children tape their pictures together in three-step sequences: before, prediction, after. Display and review the steps of the experiment.
Nature Activity Kits
Various nature activity kits are available from catalogs and online: butterfly nets, ant farms, silkworms, frogs' eggs, praying mantises, bug cages, insect-catching plants, treecrabs, bird feeders, and a butterfly garden school kit. Similar science materials may also be available from other classroom suppliers. Raising a real butterfly is a terrific, memorable experience that teaches children the meaning of sequencing and the life cycle.
Math
Counting Parts of Plants
Look at real flowers together. Record what the flowers look like with "scientific" drawings. Count the petals and leaves on flowers, and write the numbers on the drawings. If the flowers have too many petals to count, write many on the picture. Save the pictures, using them to practice classification. Ask the children: How many ways can you classify the flower pictures? Some ways are by number of petals, by number of leaves, by color, by shape, and by size.
Grow a Number
Have the class pick a lucky number. (Perhaps it should be five or six, the age of most of the children.) Wet a sponge and set it in a shallow dish. Sprinkle cress seeds in the shape of the lucky number on the sponge. Set the seeds in indirect sunlight. Have the children take turns checking the sponge each day to make sure it is damp but not too soggy. Teach them to water the dish, not the sponge, so that the sponge can soak up the water it needs. As the seeds sprout, they will lean toward the light. Ask the children why. (Seedlings like light; they need it; they seek it.) Turn the dish around every so often to keep the sprouts growing up straight. If any seeds grow out of place, weed them out.
Measure Real Plants
Have the children measure real plants as they grow with small blocks. Legos are good because they stack. Teach the children to stack the Legos next to the plants, count the Legos, and transfer the amount to a graph. Concept:
A graph is a picture of "how many."
Measure a Magic Beanstalk
Plant a magic seed in class. Have the children think of what the seed should be (perhaps a small ball) and where they should plant it (perhaps in a basket of toys). Each day, ask a child to paint a new segment of the magic plant on a twelve-by-eighteen-inch piece of green construction paper. Hold the paper horizontally so the new segment is twelve inches (one foot high). This will make it easy to count how many feet long the beanstalk is each day. Tape the paintings together on the wall so that the beanstalk climbs up and around the room. Have the children write stories about their magic beanstalk. Be sure to read them "Jack and the Beanstalk."
Art
How Many Ways Can We Make Flowers?
Provide the children with a variety of art materials, such as construction paper, small paper plates, glue, glitter, scissors, paint, markers, crayons, clay, yarn, telephone wire, twist ties, pipe cleaners, sticks, tissue paper, foil, and cellophane. You might also want to add junk materials, such as egg cartons (perhaps precut into one-cup sections), Styrofoam peanuts, cardboard tubes, and margarine containers. Ask the children to think of different ways to make flowers. Show them a few techniques, such as rolling a strip of paper around a pencil to curl it, making little wads of tissue paper and gluing them to egg carton cups, and sprinkling glitter on glue to make it sparkle. But in general, encourage creativity and a sharing of ideas. Attach flowers to pencils, florist stems, chopsticks, rulers, and dowels for stems. Make a class bouquet to decorate the room.
Photograms
To make photograms you need a special kind of light sensitive paper called Solargraphics © paper, which you can order from school supply houses.
To make photograms, collect objects with interesting shapes from nature, such as leaves, grass, stems, and flowers. Place the objects on the Solargraphics paper, blue side up, on a tray or piece of cardboard for support. Place in direct sunlight for about three to seven minutes or until the blue paper turns white. In the shade, lay the paper in a pan of tap water for two minutes. The blue color will reappear, except where the objects made a silhouette. Dry on a flat surface. Flatten dried print by pressing between the pages of a big book overnight.
CLASSIFICATION PHOTOGRAMS: Ask the children to collect shapes that are not from nature, such as keys, lace, coins, paper clips, scissors, buttons, a pencil, and a comb. Help the children classify the objects they collect and plan photograms that contain objects that go together. Display the photograms so that other children can guess what the classifications are.
Music
Oats, Peas, Beans Circle Dance*
Chorus:
Oats, peas, beans, and barley grow,
Oats, peas, beans, and barley grow,
Do you, or I, or anyone know
How oats, peas, beans, and barley grow?
Verse:
First the farmer sows his seeds,
Then he stands and takes his ease.
Stamps his feet and claps his hands
And turns around to view the land.
If you like, substitute the child's name, as follows:
Farmer Betty sows her seeds,
Then she stands and takes her ease.
Stamps her feet and claps her hands
And turns around to view the land.
*Develop the meaning of the foods in the song by baking oatmeal cookies, serving barley soup with cooked peas and beans in it, and stuffing bean bags (you can use zip-lock plastic bags) with dried peas and beans.
Have the children join hands in a circle. Singing the chorus together, hold hands and walk around in a circle to the music. (If you don't know the tune, say it as a chant.) During the verse, everyone stands still and one child (farmer) goes to the center and acts out the verse.
Flower Dance
Play Vivaldi's Four Seasons, and have the children create movements that represent various aspects of a flower's life: being seeds, sprouting, growing, waving in the breeze, being rained upon, forming buds, and flowering. Use scarves, crepe paper streamers, and flowers painted on paper plates for props. Encourage the children to contribute ideas for the fantasy ahead of time, writing their ideas on an experience chart as a story, which you can read them aloud during the musical creation.
Physical Education
Inventing Bean Bag Games
Help the children make bean bags from zip-lock plastic bags or by sewing or stapling squares of cloth together and filling them with dried peas and beans. Explain that bean bags are an old-fashioned toy that probably their parents and grandparents played with when they were young. Discuss other kinds of things that could be put in bean bags: small pebbles, pinecones, sand, and Styrofoam peanuts. Ask What about water? to encourage critical thinking on the children's part.
Have the children help think up games to play with the bean bags they make. Explain that it's good for them to be able to invent games for themselves to play when they get bored. Write their ideas for games down on an experience chart and try them out. Encourage the children to change the rules of their games to improve them. Name the games according to the children who invented them, such as Mary's Bull's-eye Game and Johnny's Bean Bag Game.
|