|
.....................................................

Many of the activities on these pages may require adult supervision.
Be sure to tell a grown-up about what you're planning and ask for permission before getting started.
Build it step by step.
1. Get Materials
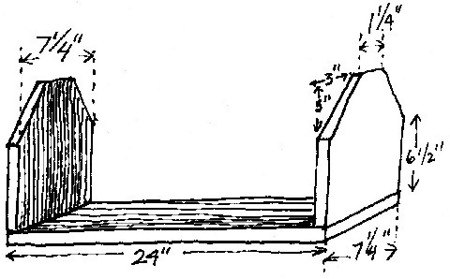
Buy a piece of pine 1 inch by 8 inches (it will actually be 3/4 inch by 7 1/4 inches) at a lumber store or scrounge it from a friendly carpenter. If you buy it, you will probably have to buy at least 8 feet. You will also need a half dozen 1 1/2- or 2-inch finishing nails (nails with very small heads).
2. Measure Three Lines
With a tape measure or a yardstick, mark the board at 9 1/2 inches and at 19 inches. Now put the end of your yardstick on the 19-inch mark and make a mark 24 inches farther along the board. With a right-angle rule or square, draw a straight line across the board at these three places.
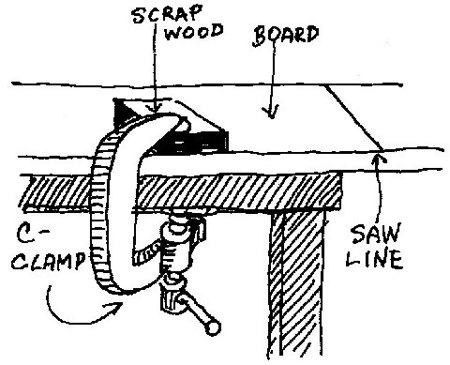
3. Clamp
In order to saw your board, you have to clamp it firmly to a work table. Use a tool called a C-clamp. Clamp the board so that the first pencil line sticks out about 2 inches beyond the edge of the table. Put a piece of scrap wood under the clamp so it doesn't mark the wood. Clamp the board as tight as you can. You can also use a vise to hold wood for sawing.
4. Saw Three Lines
Use a sharp saw made of good steel. A poor saw sticks and can be dangerous. Hold the saw at a 45-degree angle. To start your cut, put the heel of the saw (the part near the handle) on the pencil line and draw the blade toward you. (Use one hand and draw your arm back; don't use both hands and pull toward your chest.) Then push to cut. Don't push and pull too hard. Get a rhythm going. Make all three cuts.

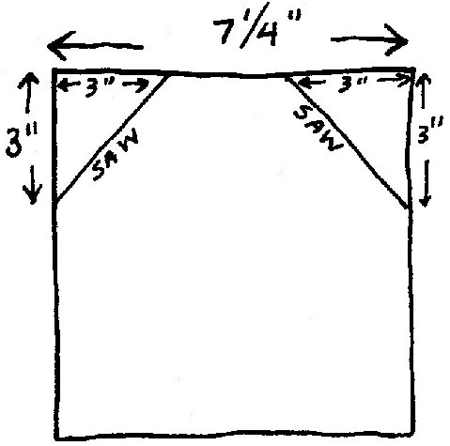
5. Make Angle Cut
Take one of the two short pieces and put it on a workbench with the 7 1/4-inch edge up. Measure in 3 inches from the upper left-hand corner. Then measure 3 inches down from the same corner. Draw a line from one mark to the other mark to indicate the line for the angle cut. Clamp and saw along the line. Do the same for the angle cut on the other side.
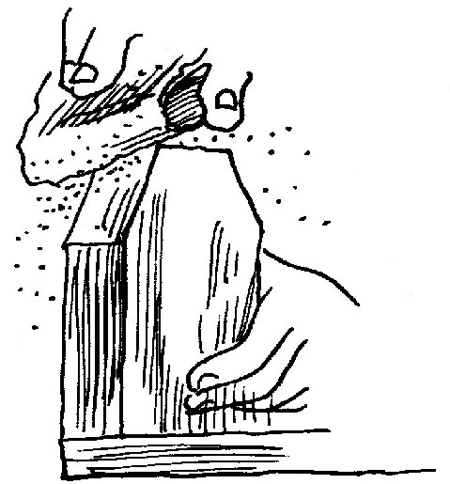
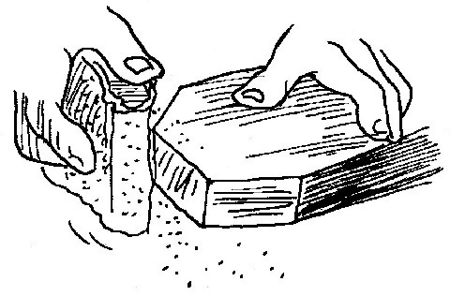
6. Sand
The cut edges of the wood will be rough. To make them smooth, rub them with sandpaper wrapped around a small block of wood. Try to hold the sanding block flat or it will round the edges. Sand all boards.
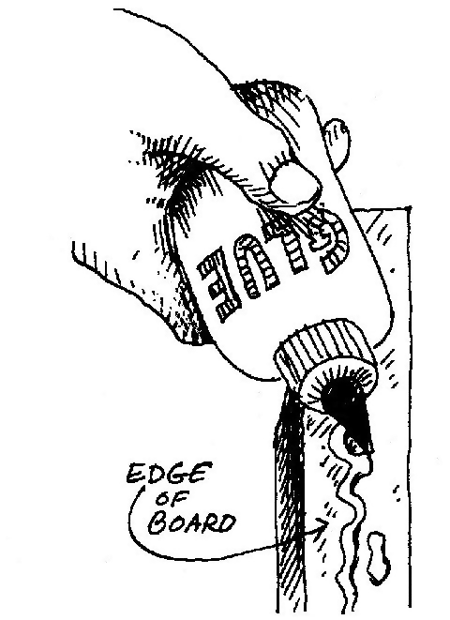
7. Glue
Squeeze some white glue along the 7 1/4-inch edge opposite the edge with the angle cuts. With a stick or piece of paper, spread the glue over the whole edge.
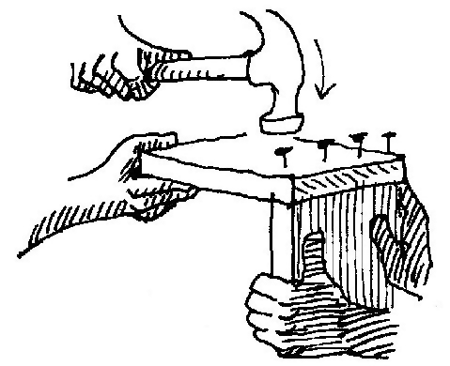
8. Hammer
Ask someone to hold the piece on a worktable with the angled end down and the glued end up. Put one edge of the long piece on top of the glued edge, making sure all edges are flush. Hold a nail near the point against the wood. Tap gently until the point goes in. Hammer a little harder. When the nail stands by itself, don't hold it anymore. Put in four nails. Wipe off excess glue. Attach other end too.
9. Dry
Now comes the hard part. The glue has to dry for at least 45 minutes. An hour is even better. Be patient.
One thing you can do is wipe away any glue that has oozed out of the cracks. Use a damp paper towel.

10. Sand Again
If any of the edges you nailed together didn't quite meet, you can fix them up now by sanding off the part that sticks out. Go over the whole piece. If you want to round the corners of the wood slightly, sand them now. Sand the flat parts of the boards too. When you are done, brush the book holder well with a dry cloth to get off all the sawdust.
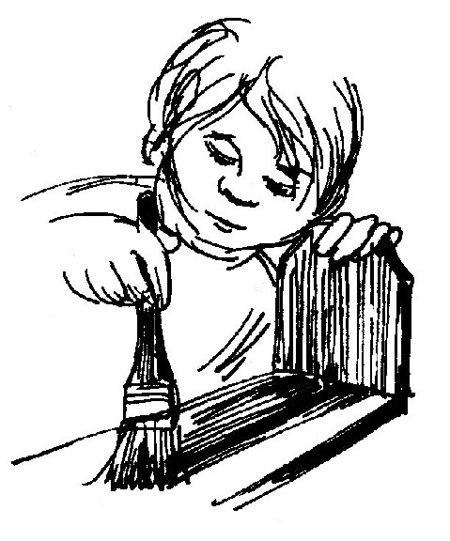
11. Paint
Spread newspaper down on your work surface. Use water-base paint. Read the instructions and cautions on the paint can and follow them. When you're done, wash your brush in water.
12. Clean Up
Whenever you finish a project, clean up afterward. Put away the tools you used so you will have a neat area in which to begin your next work.
Click here for TOOLBOX
Click here for MORE IDEAS!
|